Brownifer Bites: June 2017

Friday, June 16, 2017

Homemade Organic Spiced Nuts (w/recipe)

One of my besties makes spiced nuts for a snack for her family regularly and I tried some last week.  So while I was cleaning out the Brownifer Pantry and re-organizing, I realized we have a TON of raw, organic nuts and seeds.  I decided to put them to good use and make a batch of my own spiced nuts!

So I did.  And they're amazing!  Healthy, organic and no chemicals or additives that will give me headaches!!!!!  SCORE!

These would be great for parties or divided in smaller containers/baggies for lunch snacks on-the-go!

Try it out:

Ingredients:

  • 2 1/2 Cups Nuts/Seeds of your choice (if using salted nuts, omit salt from spices)
  • 1 teaspoon chili powder
  • 3/4 teaspoon cumin
  • 1/2 teaspoon or so black pepper
  • 1 teaspoon smoked paprika
  • 1/2 teaspoon cayenne pepper (more if you want spicier)
  • 2 tablespoons extra virgin olive oil
  • 2 tablespoons maple syrup
  • 1/2 teaspoon coarse salt (we used fleur de sel)
Directions:
  • Heat the oven to 325 degrees
  • Mix the spices in a small bowl and set aside
  • In a separate, larger bowl, mix the olive oil and maple syrup
  • Spread the nuts on a large baking sheet and roast for about 12 minutes, watch them carefully and make sure they don't burn
  • Pour the nuts into the larger bowl with the oil and syrup, stir to coat
  • Sprinkle the spices over the nuts and stir again to mix in the spices
  • Spread nuts back out onto the cookie sheet
  • Bake for another 3 minutes  - taste to see if you want to add more salt before final bake
  • Remove nuts from oven, stir/flip on the cookie sheet and back for another 3 minutes
  • Let nuts cool on the cookie sheet until you can handle them and transfer to a storage container

We store our nuts in the pantry - they should be good for a week or so but I doubt they'll even last that long!  

Thursday, June 15, 2017

Chicken Ramen w/Shiitake Mushrooms (with recipe)

I had huge plans the other night to actually make dinner.  But Thing #5 was so into her baking that it just didn't happen. I'd printed a recipe and everything!  Bless Brownie for taking over when he got home so the baking could continue.  He hates to follow a recipe, but he indulged me!

This is easy, delicious and inexpensive to make.  You'll love it!

Our meat counter would not remove the bone from breasts AND leave the skin on, so we opted to grill our chicken instead.  No regrets, it was amazing just how it turned out.

A bit of advice for those who don't like spicy food .... this isn't spicy. Don't let the jalapeño scare you!  I don't eat the jalapeños in this type of recipe, but I leave them in the broth for flavor - it just wouldn't be the same without them!


This recipe is for two people - two bowls.  Adjust accordingly!!!

Ingredients:
Costco has these!!!!!
  • 2 chicken breasts
  • Salt, pepper, garlic powder to season/to taste
  • 1 tbsp butter
  • 2 tsp sesame or vegetable oil
  • 2 tsp fresh ginger, minced
  • 3 tsp fresh garlic, minced
  • 3 tbsp low-sodium soy sauce
  • 2 tbsp apple cider vinegar
  • 4 cups rich chicken stock
  • 1 oz dried shiitake mushrooms (or 1/2 cup fresh)
  • 1-teaspoons sea salt, to taste
  • 2 large eggs
  • 1/2 cup scallions, diced
  • 2 (3 oz) packs dried ramen noodles
  • Fresh jalapeño slices for serving
Directions:
  • Cook the chicken - rub meat down with desired amounts of salt, pepper and garlic powder and grill outdoors as you normally would, cooking thoroughly
  • Make the ramen broth:  Heat the oil in a large pot over medium heat, until shimmering. (yes, shimmering like hot oil does - not simmering as in bubbles)  Add the garlic and ginger and cook for a few minutes until softened.  Add the soy sauce and apple cider vinegar, stir to combine.  Cook for another minute.  Add the stock, cover, and bring to a boil.  Remove the lid, let simmer uncovered for 5 minutes, then add the dried (or fresh) mushrooms.  Simmer gently for another 10 minutes and season with salt to taste.
  • Make the soft-boiled eggs:  Fill a pot with enough water to cover the eggs, bring to a boil.  Gently lower the eggs (still cold from the fridge) into the boiling water, let simmer for 7 minutes (for a slightly runny yolk) or 8 minutes (for a soft, but set-up yolk)
  • Meanwhile, fill a large bowl with ice water.  When the timer finishes on the eggs, transfer them to the ice bath to stop the cooking process.  Wait at least 5 minutes or until cool enough to handle, then carefully peel away the shell and slice in half, lengthwise.  Set aside until ready to serve.
  • Add ramen noodles to boiling water, cook for 2-3 minutes, until soft, then divide the noodles into two large bowls.  
  • Chop the scallions and jalapeño
  • Add the sliced chicken and the ramen broth, dividing the mushrooms between bowls.  Top with the fresh scallions, jalapeño and soft boiled egg.  Serve immediately.
We loved this so much!  It's definitely going in our recipe box for future use!!!!


Wednesday, June 14, 2017

Fluffernutter Cookies (with recipe)

Monday was Peanut Butter Cookie Day and Thing #5 loves any excuse to be in the kitchen baking!  She wasn't thrilled with plain PB cookies, and the 2nd recipe we tried was not to her liking.  Not sweet enough.  I linked to it, however, in case you want to give it your own try!  I think it would be delicious if you were detoxed off sugar!

No, the Fluffernutters were far more interesting to a 9-year old with the marshmallows :-)  I printed a recipe for her and she was ON it!

A couple of comments on the recipe first:

Yes, moving the marshmallows from the edge keeps them from getting chewy and sticking to the wax paper but .... if it happens, don't panic.  It's actually a nice texture and gives it a toasted marshmallow effect.

The 7 minute baking time....I think we make bigger cookies than most?  7 minutes wasn't nearly long enough in our oven.  The centers were not cooked.  We experimented and 12 minutes in the oven with a 5 minute resting time was what worked for what we wanted.  Big spoonfuls, I guess?

This makes a LOT of cookies!  Make sure you have time for baking or use two cookie sheets to bake at a time.

Don't skip the wax paper!  Your cookie sheets will be a nasty mess if you do! :-)

Ingredients:
Yes, organic marshmallows
exist!!!!

  • 1 cup organic butter
  • 1/2 cup creamy peanut butter (we used Adams)
  • 2 tablespoons coconut oil
  • 1 1/2 cups brown sugar (packed)
  • 2 eggs
  • 1/2 teaspoon salt
  • 1 teaspoon vanilla extract
  • 1/2 teaspoon baking soda
  • 1/2 teaspoon baking powder
  • 2 1/4 cups all-purpose flour
  • 2 cups semi-sweet chocolate chips
  • 1 1/2 cup mini-marshmallows
Directions:
  • Preheat oven to 350
  • In a large mixing bowl, cream the butter, peanut butter, oil and sugar until light and creamy
  • Add eggs, salt and vanilla and mix well
  • Mix in baking soda and baking powder and gradually mix in flour until combined.
  • Stir in chips and marshmallows.
  • Drop spoonfuls of dough on parchment-lined cookie sheet about 2" apart (If any marshmallows are on the very edges of the cookies, move them into the middle or they will caramelize and get a bit crunchy)
  • Bake for 7 minutes and let rest on cookie sheet 5 minutes before transferring to a wire cooling rack.
  • Store tightly covered and room temperature


Tuesday, June 13, 2017

Chocolate Cupcakes w/Buttercream Frosting (with recipe)

Today is National Cupcake Lovers Day!  In honor of this, Thing #5 was happy to make some cupcakes for the blog last night!  That girl loves to bake!

We used a cake recipe turned cupcake recipe I loved from one of the kids' birthdays and a frosting recipe we downloaded in an e-book from a blog I discovered.  Thing #5 is going to be gaining a LOT of baking insight from them in the future.  Pretty sure they're her soulmates.

Do make sure you have enough time to make these, don't rush it.  Very important to let cupcakes cool completely before putting your frosting on .... but you all know this, right?  You don't need details on how to make a cupcake.

Here are your recipes for cupcakes and homemade buttercream frosting!  On National Cupcake Lovers Day, calories don't count!

CUPCAKES

Ingredients:

  • 1 cup all-purpose flour
  • 1 cup granulated sugar
  • 1/2 cup cocoa powder
  • 1 teaspooon baking powder
  • 1/2 teaspoon baking soda
  • 1/2 teaspoon salt
  • 1/2 teaspoon espresso powder (can't find it?  Here are some alternatives)
  • 1/2 cup milk
  • 1/4 cup vegetable oil
  • 1 large egg
  • 1/2 teaspoon vanilla
  • 1/2 cup boiling water
Directions:
  • Preheat oven to 325 degrees
  • Place cupcake liners in muffin tin
  • Add flour, sugar, cocoa powder, baking powder, baking soda, salt and espresso powder to a large bowl, whisk or stir with a fork to combine.
  • Add milk, oil, egg and vanilla to flour mixture and mix together on medium speed until well combined.
  • Reduce speed and carefully add boiling water to the cake batter, Beat on high speed for about 1 minute to add air to the batter.
  • Evenly distribute cake batter to your cupcake liners - start with 1/2 full and keep distributing until batter is gone
  • Place in the oven and bake until a toothpick inserted in the center comes out clean, about 20 minutes.
  • Remove from the oven and allow the cupcakes to cool completely before frosting
BUTTERCREAM FROSTING:
Ingredients:
  • 4 cups Organic Powdered Sugar 
  • 1 cup (2 sticks) Organic Butter
  • 2-3 teaspoons of Vanilla (we used 3)
  • 1-2 tablespoons Milk
Directions:
  • Add powdered sugar to mixing bowl with softened sticks of butter, vanilla and 1 tbsp. of milk
  • Beat on low until powdered sugar is incorporated.
  • Move mixer up to medium-high speed, scrape sides and bottom of bowl often.
  • When completely mixed the frosting may appear dry
  • First try at piping frosting!  She
    did a great job!
  • Add milk in small amounts at a time until frosting is the consistency you're looking for.

Thing #5 was gifted with her first beginner's frosting piping tips and bags last night and after watching a tutorial on YouTube, she tried her hand at making pretty swirls!  You can just as easily pile on your frosting with a butter knife as we've all done for years.  Either way - these are hands down the BEST chocolate cupcakes with the most amazing frosting .... Happy Cupcake Lovers Day!!!!


Thursday, June 8, 2017

Pesto Pasta Bake (with recipe)

Brownie is busy with Baseball - so you were expecting vegetarian, right?

Thing #2 made this on our last weekend together.  He did an awesome job and it was delicious.  But I was so focused on watching him and multi-tasking as Thing #5 simultaneously mixed up a batch of chocolate banana muffins from her cookbook, that I didn't get any photos of his creation.  

So tonight I decided to make it again and make sure to get some pictures!

Yes, it's vegetarian but it's SO flavorful!  I printed this recipe some time ago from the internet but have no idea from where.  I've modified it a bit to fit our taste and for convenience.  Try this:

Ingredients for Pesto:

  • 4 cups fresh basil (Basil sells quickly this time of year, I bought a large bunch from Safeway and yes, used the entire thing for this recipe.)
  • 4 Cloves garlic (snip off the tips of each end of the cloves before blending)
  • 1/2 cup Pine Nuts
  • 3/4 cup parmesan, finely grated
  • 3/4 cup Olive Oil
  • 1/4 cup cold water
  • 1/2 cup heavy cream (FYI - one small carton of cream is enough to make this recipe twice!)
  • 1 teaspoon salt
  • 1/2 teaspoon pepper
Ingredients Cont'd:
  • 16 oz. Pasta (use whatever you have on hand, or whatever you prefer)
  • 1 cup cherry tomatoes, halved (this is great for slightly withered cherry toms that my not be appetizing for snacking any longer - they're going to be cooked anyway!  Thing #5 didn't leave me 1 cup to work with, but it was close)
  • 1 cup parmesan, finely grated
  • 8 oz. ball fresh mozzarella (cut into small 1/2" pieces or sliced, as you wish)
Directions:

  • Make Pesto - place all ingredients in a food processor or blender and blend well, set aside
  • Cook pasta to very al dente, or about 3-4 minutes before the package instructs for the cook time
  • Preheat your oven to 400 degrees
  • halve your cherry tomatoes
  • In a casserole pan, mix pasta, cherry tomatoes and pesto sauce
  • Top with grated parmesan and mozzarella pieces
  • Bake at 400 F for 10-15 minutes, or until mozzarella has melted.
  • Garnish with additional parmesan and fresh basil, serve immediately.
The flavor of this is phenomenal.  Even our pickiest Thing #5 loves this!  It's simple and easy and will quickly become a family favorite - we promise!

Fresh from the oven:

Friday, June 2, 2017

Summer Bruschetta (with recipe)

We love summer!  Fresh fruits and vegetables are available everywhere you look and organic produce is so easy to come by locally!

If you've never made bruschetta ... it's sort of like the Italian version of chips and salsa!  So of course, Jen is a huge fan.  Chips and salsa is a must-have staple in the Brownifer household!

We're still working on using up leftovers from our Cuban Sandwiches so instead of using pita chips for a quick and easy bruschetta fix, we toasted some of our leftover Cuban Hoagies to make this one.  Normal we'll buy a baguette and slice it, but we work with what we've got!  Whatever bread you have, I guarantee it will work.


Ingredients:
  • 3-4 Heirloom tomatoes - the more colors, the more fun!
  • 2/3 Cup chopped fresh basil
  • 2/3 Cup chopped onion (as fine as you like)
  • 5-6 cloves garlic, minced (however much you like - we go crazy with garlic)
  • Salt & Pepper to taste
  • Sliced bread for toasting
  • Olive Oil
  • Garlic Powder
Directions:
  • Mix tomatoes, onion, basil, garlic in a bowl and salt/pepper to taste
  • Let mixture sit for 30 minutes or so for flavors to combine, stirring periodically
  • Slice bread and place on a cookie sheet, drizzle with olive oil and sprinkle with garlic powder
  • Put bread in the broiler or oven until crisp and browned to your liking
  • Spoon tomato mixture onto bread and serve!
Brownie likes to sprinkle his bruschetta with romano or parmesan cheese - I prefer it light and fresh.  You can vary this recipe in so many ways, its a fun one to play with and a simple side to so many summer dishes! 


Eggs Benedict Cuban-Style (with recipe)

What to do with all that leftover pulled pork and delicious ingredients for Cuban Sandwiches when you're getting tired of eating Cuban Sandwiches?  Here's an idea for you!

Jen's favorite breakfast food is Eggs Benedict - so we wanted to try giving her favorite dish a Cuban flair - and it worked marvelously!  

Re-heat your pulled pork and ham and get ready to try this one!  This recipe is for two servings - but you'll be cutting up bread enough for 4 so adjust accordingly!

This is also easier done with two people so one can be poaching eggs while the other is whisking (and whisking and whisking) Hollandaise sauce!

Ingredients:
  • Pulled Pork
  • Ham Slices
  • Cuban Hoagies
  • 4 Organic Eggs (for poaching)
  • 4 Organic Egg Yolks (for Hollandaise)
  • 2 Sticks Organic Butter
  • 1 Tablespoon White Wine Vinegar
  • 1 Teaspoon White Pepper (use whatever you have on hand, this is just what we used)
  • 1/2 Teaspoon Sea Salt
  • Juice of 1/2 Lemon
  • 1/4 Cup Cold Water
  • 1 Tablespoon (or so) Yellow Mustard
  • Dill for garnish (we sprinkled dried dill - you could use fresh as well of course!)
Directions:
  • Put pulled pork in oven to re-heat on a low setting while you work on your sauce
  • Gather all ingredients for your Hollandaise and get them together by the stove - you'll need to do this quickly.
  • Melt butter in a small saucepan over medium heat; slowly bring to a boil, skimming froth from surface. (I used a large spoon and just kept skimming until the layer on top was gone) Carefully pour melted butter into a small bowl, holding back the milky sediment in the bottom of the pan. The clarified butter should be the color of light olive oil; let cool to room temperature.
  • Wash saucepan thoroughly and dry - returning to stove for next step.
  • While the butter is cooling - slice your Cuban Bread as you would for a sandwich, then cut in 1/2 to make 4 smaller pieces.  Place in toaster so they're ready for toasting.
  • In saucepan, mix vinegar together with 1/4 cup cold water and pepper. Place over medium-high heat until liquid is reduced by one-third; remove from heat and let cool completely. (I filled a sink with cold water and placed the bottom of the pan in the water until it was cooled to speed things up)
  • Add egg yolks to cooled reduction and whisk to combine.
  • Place saucepan on stove over very low heat; whisk, making sure the whisk comes in contact with the bottom of the pan. Gradually increase heat whisking, so the sauce emulsifies progressively and becomes smooth and creamy, 8 to 10 minutes; do not let the temperature of the sauce rise above 150 degrees.
  • While you're doing this - have someone start poaching eggs, toasting bread and getting your meat out and ready to plate!
  • Remove saucepan from heat and whisk in clarified butter in a slow, steady stream; season with salt. Stir in lemon. Use a fine mesh strainer; strain mixture and discard solids. Whisk in mustard; Use sauce immediately.
  • On a plate, place warmed ham on your toasted bread, topped with some pulled pork.  Lay two poached eggs on top of the meat and spoon on your Hollandaise sauce.  Garnish with dill and serve warm!
If you're making this by yourself, you'll have to figure out how to time it well, but it will be worth it!  This has some wonderful Cuban Sandwich flavor but it's clearly breakfast!  And just like the sandwiches, it's VERY filling.  We loved it!!!!!  This one is definitely going down as a success.

I modified the Hollandaise recipe I found here for this adventure.  

Thursday, June 1, 2017

The Brownifer Cuban Sandwich


We were inspired by our visit to Stick a Pork In It to create our own version of the Cuban Sandwich. We hit the Internet Super Highway and did some research on the history of this tradition.

I won't bore you with the research, you can look all of that up yourself.  But we decided to stay authentic, leave off the salami and give it our own flair with Brownie's smoked, pulled pork.

In researching this sandwich, I found that Cubans are very adamant that you use Cuban Bread for this, so I did some reading on that as well. My adventure perfecting Cuban Hoagies finally came together in batch #3, they were delicious! You should definitely give them a try - not sure this would have turned out the same if we hadn't used them!

Now, pulled pork takes quite a few hours to do and you can't really time it. It's done when it's done. So we decided to make a Cuban Night of it and invited friends over for Mojitos and a Cuban-themed meal.  This also gave us a chance to get more opinions on our creation, which we love.

I'll shut up now, here's what we did:

Ingredients:

Pulled Pork (smoked on your own BBQ grill if possible)
Ham slices (we had the deli slice ours so the thickness was where we wanted it and uniform)
Brick of Swiss Cheese, thinly sliced
Sandwich Slicer Pickles (we even found organic ones with no artificial dye!)
Mustard - lots of mustard!
Cuban Hoagies (substitute any hoagies or bread - you know what you like)

Directions:

  • Slice Hoagies sandwich-style
  • Put mustard on both bread slices. A lot of mustard - and don't be shy - use that mustard!!!!!
  • Lay top and bottom on broiler tray and liberally add a layer of sliced Swiss Cheese to each and put under the broiler on low until the cheese is melted
  • Lay down your ham slices on the bottom slice of your sandwich (our bread used two slices)
  • Lay down a layer of pickles - thick as you like (we used four to cover the bread)
  • Top with pulled pork and put the top on your sandwich, pressing down so that cheese can do its job and hold everything together
  • Slice sandwich at the diagonal
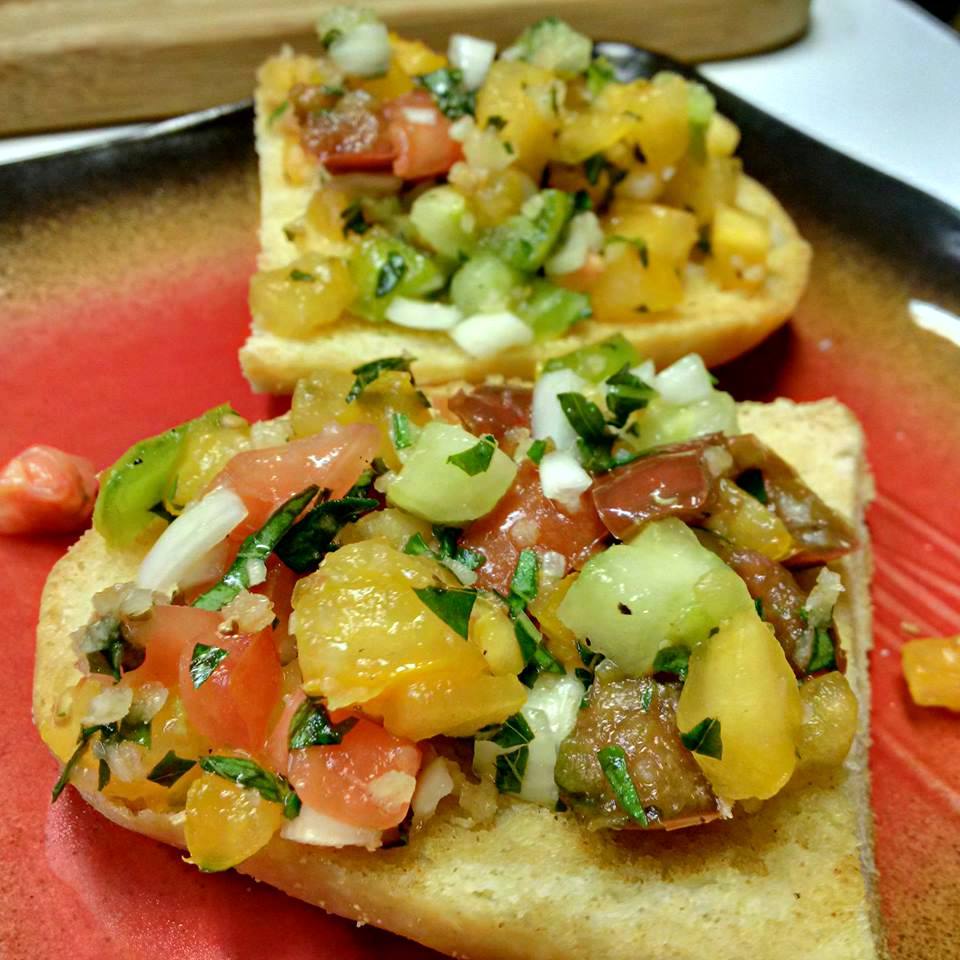
We served our Cubans with some traditional sides that I found recipes for here.  They turned out really well!  There were two of us in our dinner party who are not fans of sweet potatoes - and we loved the potatoes!  So even if it's not your thing, give it a try!  And the beans were so flavorful but a word to the wise, (learn from my Mojito-fueled mistake) measure your salt!  I always under-salt things and Brownie is always adding more salt to my recipes so ... in my mind I needed to add more than it called for.  Don't.  They tasted fabulous, but I used way too much salt.

These sandwiches were the talk of our Memorial Day weekend!  All of our guests loved them, but only one could finish the whole thing!  They're large.  We finished the night off with Mojitos, spiced rum and cigars by the fire .... all of us too full to eat anything else.

Try these out and let us know what variations you used and how they turned out!

¡Que aproveche amigos!