Brownifer Bites

Monday, August 22, 2016

Smoked Kokanee Fillets with 'Dirty' Potato Salad


Tonight we were blessed with some Kokanee fillets from a friend who spent the weekend fishing in a tournament.  Lucky us!

It didn't take long for Brownie to fire up the charcoal!  Keep in mind, these are smoked on the BBQ, not grilled. The fish just wouldn't have paired with the 'dirty' potato salad if it hadn't been smoked.

So here it is for approximately 2 servings:

Ingredients:
  • 4 cups chopped potatoes (as you wish)
  • 2 Tablespoons olive oil
  • 2 cloves minced garlic
  • Salt
  • Pepper
  • 3 sprigs fresh Thyme
  • 1 pad salted butter 
  • 1 cup Tzatziki (our recipe here)
  • Chopped green onion
  • 4 - 6 Smoked Kokanee Fillets
  • 3 tablespoons raw honey
  • 2 Tablespoons whole grain mustard
  • 1 Tablespoon horseradish mustard
Directions:
  • Toss chopped potatoes with olive oil, garlic, thyme, salt and pepper to taste
  • Place potatoes in tin foil - before sealing, put pad of butter on top of potatoes
  • Place on the grill over medium/high heat or in the oven at 400 until fork tender
  • Put honey in a microwave-safe bowl and microwave just enough to warm it
  • Mix mustards with honey and whisk with a fork until a sauce forms
  • Toss cooked potatoes with Tzatziki until coated
  • Put 1/2 of potatoes on each plate
  • Place fillets over potato salad
  • Sprinkle with chopped green onion
  • Drizzle desired amount of honey/mustard sauce over your creation
Enjoy!   The spice rub combines nicely with the honey/mustard mixture to give you that tangy Barbecue taste. A sophisticated spin on BBQ and potato salad!

Now go fishing so you can whip this up!

Smoked Kokanee Fillets

No, it isn't bacon, don't get excited. :-)

This is the basics of what Brownie did to smoke a mess of Kokanee fillets for our Smoked Kokanee with 'Dirty' Potato Salad.

If you smoke meats often, then we don't have to tell you about charcoal and wood chips and times, etc. Just smoke your fish. But we wanted to include the spices used for this because the flavors are an integral part of pulling this dish together.

Rub:

  • Sprinkle fillets lightly with a mixture of granulated garlic, onion powder, a pinch of cumin, cayenne pepper, paprika, sugar
Brownie used Pecan chunks and Alder chips for smoking.

House of Noodle - Albany, OR (Review)

If you've never been to Oregon, Albany is about 1/2 way between Eugene and Portland right off Interstate 5. This is your standard blue collar town but lately, the food scene here has been expanding. Thai food in this town was unheard of 10 years ago, so when House of Noodle appeared, I was pretty excited.

This restaurant opened its doors in 2010 in the location of an old Pizza Hut and I dare say not the most convenient location to get in and out of, so many people speculated whether or not this little Thai joint would last. But last it has!

The restaurant is clean and simple with a TV and wi-fi, relaxed atmosphere and perfect for families. The staff has always been friendly and attentive with the occasional hiccup when it's busy.

The food is probably a bit Americanized to be considered 'traditional' but I think that's part of its success in this town.

The appetizers are what you would expect; spring rolls, won-tons, salads. As you can see in the pictures, impeccable plating isn't a strong point but I have yet to try an appetizer here that wasn't good! Their sauces are very tasty and are well paired with the food.

Spicy Chicken Salad (Larb), Siam Spring Rolls, and Westside Wonton

My favorite is their Drunken Noodles, so I had to include them in this review! Yes, these noodles do have a tendency to clump a bit, especially if you order take-out or delivery, but their flavor is delicious and you can choose your own spicy level.

Drunken Noodles with Beef

Ryan tried the Pad Thai this time around and ... the noodles were very good.  The shrimp was very bland, though; like it hadn't been seasoned at all.  May have been an oversight, bland is not usually a word I use when we visit this restaurant.

Pad Thai with Shrimp

If you're looking for a truly authentic, upscale restaurant to transport you to Thailand - this probably isn't the place you're looking for, but we really don't believe that's what this noodle joint is trying to be.  Take it as it is, but if you're in the mood for yummy noodles and a relaxing environment to just visit and eat ... this is perfect for you.  They also deliver - which you just can't beat on those weeknights when you don't want to cook.  They ARE closed on Sundays, which has been an inconvenience to me more than once.  Everyone deserves a day of rest!

We gave House of Noodle 4 out of 5 stars on our Brownifer scale.  It's clean, friendly and the noodles never disappoint.  It's consistently been what it is for 6 years ... we can respect that!


Friday, August 19, 2016

Chicken Salad Stuffed Pitas w/Greek Salad

I love summer!  There is just so much amazing produce available everywhere!!!

I was craving something flavorful, so while Brownie played a baseball game in 100 degree heat - I hid at home and played in the kitchen.

Unsupervised.

And it didn't end in disaster!  WIN!

I wish more of this was from our garden, but the only thing I can claim was ours is the tomato.

I think Brownie gets nervous when he comes home and finds me in his kitchen, but last night he was pleasantly surprised!  These will be a new favorite around here.  He also found out I know how to put together an amazing Tzatziki sauce so ... now I'm in trouble.

Ingredients:

  • 1 Package pre-cut pitas
  • Chicken Salad (my recipe is here if you need one)
  • Thinly sliced radishes and cucumber (I used the mandolin)
  • Mesclun Greens (or your favorite lettuce)
  • Tzatziki Sauce (recipe in link above)
  • Greek Salad or pasta salad
Directions:
  • Open pita pocket and put a layer of greens on the bottom, topped with a layer of radishes and cucumber (as shown)
  • Drop a spoonful of tzatziki on top of your layers and spread it around to cover the bread (as shown)
  • Spoon in your chicken salad and fill the rest of the space.
  • Serve with deli salad of your choice - I mixed up a quick Greek salad that I'll explain below quickly.


For the Greek salad, I chopped up some cucumber, tomato, red onion, pitted kalanata olives and tossed them in a bowl with some feta crumbles, lemon juice, salt and pepper until it tasted how I prefer.  Nothing fancy, just delicous!

Make some pitas and share with us!

Rosemary Chicken Salad

Here's the deal.  Sometimes, I buy a whole, cooked, organic chicken to play with.  These have turned into enchiladas, chicken noodle soup and ... chicken salad for sandwiches!  Time is not a luxury we have, so cooking a whole chicken isn't an option.  Don't beat yourself up if you do this too.

I won't say it's 100% kid-approved.  In our house, it's 60% approved.  Thing #3 and Thing #5 don't like the 'crunchy stuff' in this.  So they miss out.  We're still crossing our fingers that those two will become more adventurous as time goes on.

But for the rest of us, it's so delicious!  Here ya go:

Ingredients:

  • 2 Cups cooked, shredded chicken
  • 1 Stalk Celery, finely chopped
  • 1/4 Cup onion, finely chopped
  • 1 Tablespoon ground rosemary (I have dried rosemary sprigs, so I use my mortar and pestle to grind them into powder - powder is important in this recipe!)
  • 3/4 Cup mayonnaise 
  • 1 Tablespoon yellow mustard 
  • 2 teaspoons garlic powder
  • salt & pepper to taste
Directions:
  • Mix it all together until it tastes divine! :-)
I would eat this with a spoon!  It's so good.  I won't say I used exactly 3/4 cup mayo - I actually found out we HAD no mayo in the fridge so I had to make my own - an adventure I'm not going to share :-)  But it worked out just fine!  Just mix it in until the consistency is to your liking.  If the kids weren't going to eat it, I would probably use a horseradish mustard ... but this is my simple go-to version.

Go buy a chicken!

Jen's Tzatziki


This is just a quick instructional blog for how I put together my tzatziki.  I'm the sauce queen in this house and Brownie is in love with this.

First let me say that the measurements below are approximate - which is why I took pictures of my ingredients in my hands below so you could see about how much I actually used :-) Do what tastes good to you!


Ingredients:

  • 1 medium cucumber
  • 1 Pint or so of plain Greek yogurt (I used 3 tubs of what is pictured, which gave me a bit more than a pint)
  • 4-5 cloves fresh garlic
  • 2 Tablespoons chopped fresh dill
  • 2 Tablespoons finely chopped red onion
  • 1 Tablespoon white wine vinegar
  • 1 TeaspoonSalt
  • a few grinds of fresh ground Pepper
  • 1 Tablespoon Lemon juice (I used lime) 


Directions:

  • Remove seeds from cucumber by slicing length-wise and using a spoon to scrape out the center until the seeds are gone.
  • Grate cucumber (with peel on) into a colander and sprinkle with salt, toss, sprinkle a bit more salt
  • Let cucumber sit for 5 minutes in a clean sink to drain
  • Using your hands, squeeze the cucumber to remove as much excess water as you can.  You can see in the pictures to the right how much it reduces in size, but this will keep your tzatziki from being watery and separating.
  •  Place drained cucumber in a mixing bowl and add all other ingredients and mix together!
  • Let sauce sit in the refrigerator for an hour or two before serving to let the flavors mingle. Taste before serving and adjust garlic, salt and pepper to your liking.
This is amazing with anything, really.  Dipping fresh vegetables especially!  I used this spread on my Rosemary Chicken Salad Pitas and we are plotting a Gyro experiment with it as well :-)  Enjoy!

Wednesday, August 17, 2016

Homemade Pizza

I know, it's convenient to just order a pizza and call it good.  But once you try homemade pizza - you'll at least think twice about ordering take-out.  I will admit, on lazy days - we still have our favorite pizza we order.  Even those who love to cook .... just don't want to cook sometimes.

This is the absolute FIRST thing we made with Thing#1 through Thing #5 when we were first blending our (not so) little family.  They've always had fun rolling the dough and sprinkling cheese ... they've even made their own sauce before!  It's a family affair!
BEFORE BAKING

And it isn't that difficult!!!!! We haven't explored pizza dough recipes, though it's on our list of to-dos for sure. Our local Co-op carries a fantastic brand of dough made locally that we usually buy, but this time I was on the other end of town and picked up 4 balls of dough from Market of Choice that we had never tried.  We had to make FOUR PIZZAS!!!! Convenience-wise - it was perfect.  But the flavor wasn't quite as good as our normal dough.  Did we care feeding 9 people?  No. But lesson learned:  ready-made single-pizza servings of dough are SO convenient!!!

In the whir and blur of cooking and baking and birthday festivities, we didn't document every step with a photo for you, but I'm sure our readers have watched a pizza being put together before, so we have faith you'll fill in the blanks!  The recipe below is for 1 pizza, probably the equivalent of a medium in a pizza parlor. Yes, that is a link to our own Pizza Sauce recipe in the list below.  Try it, you won't regret it!

You'll Need:

  • 1 ball of pizza dough
  • Flour
  • Rolling Pin
  • Pizza Pan or stone
  • Grated/shredded low-moisture mozzarella cheese
  • Pizza Sauce
  • Toppings
Sounds easy so far, right!?

Directions:
  • Preheat your oven to the temperature required to bake your dough
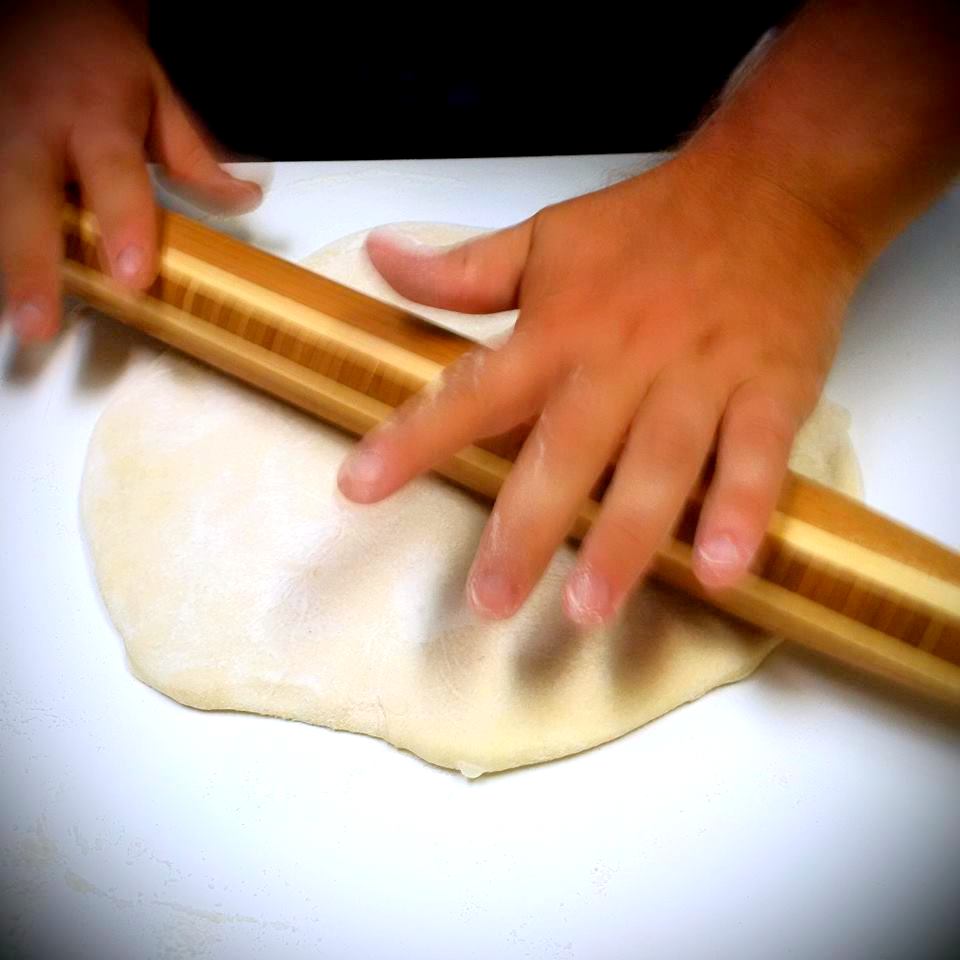
  • Sprinkle some flour out and roll/toss your dough until it's the size and thickness you prefer
  • Put dough on pan and spread flat
  • Brush dough lightly with olive oil and sprinkle with a little garlic salt 
  • (Optional) Bake in the oven for 4-5 minutes to crisp up the dough
  • Spread your pizza sauce on your dough, however thick and plentiful as you like
  • Sprinkle some cheese, lay down your toppings, finish sprinkling with cheese
  • Bake until the crust on the bottom/center is cooked through
  • Let pizza rest for 5 minutes out of the oven before slicing

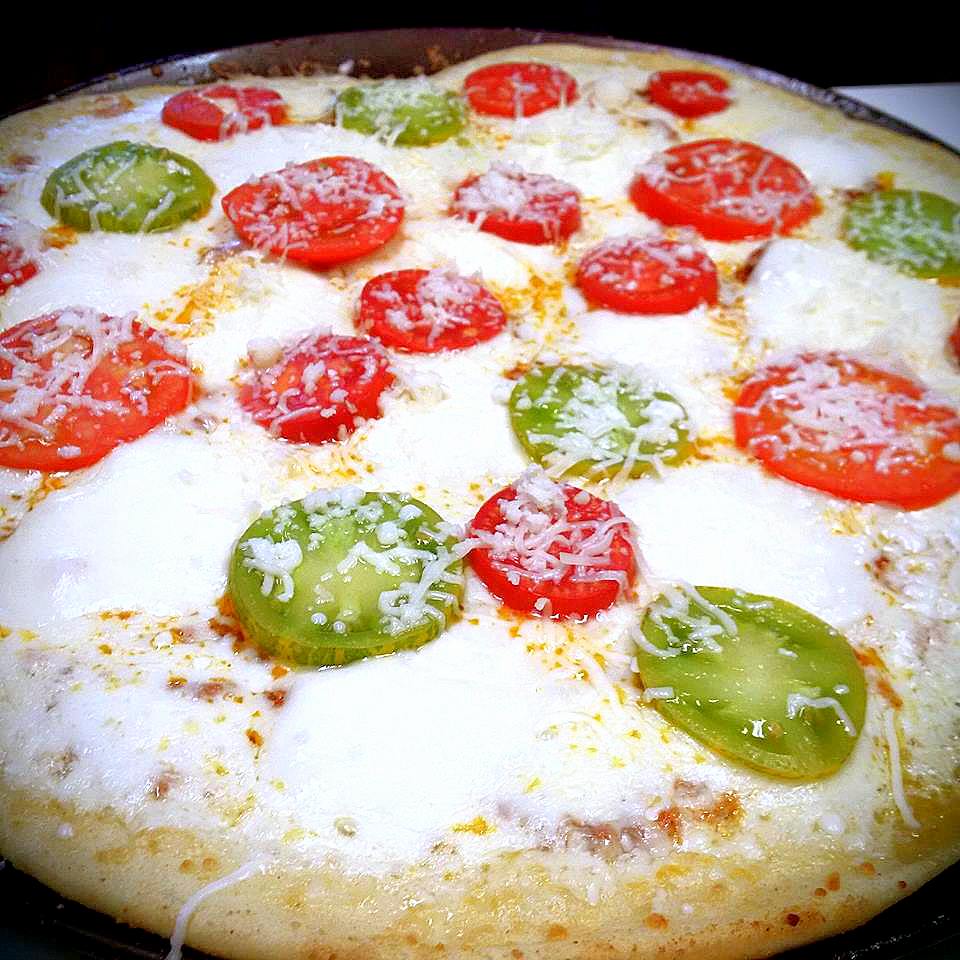
Tips:  If you're going to use fresh basil as a topping, as we did with our margherita pizza, do NOT bake it, sprinkle it on when the pizza comes out of the oven.

Those are Green Zebra and Polish Linguisa tomatoes from our garden - aren't they pretty!?  They were just as delicious as they look, I'm not gonna lie!

Get baking!!!!!